Buttons and widgets
Product page button
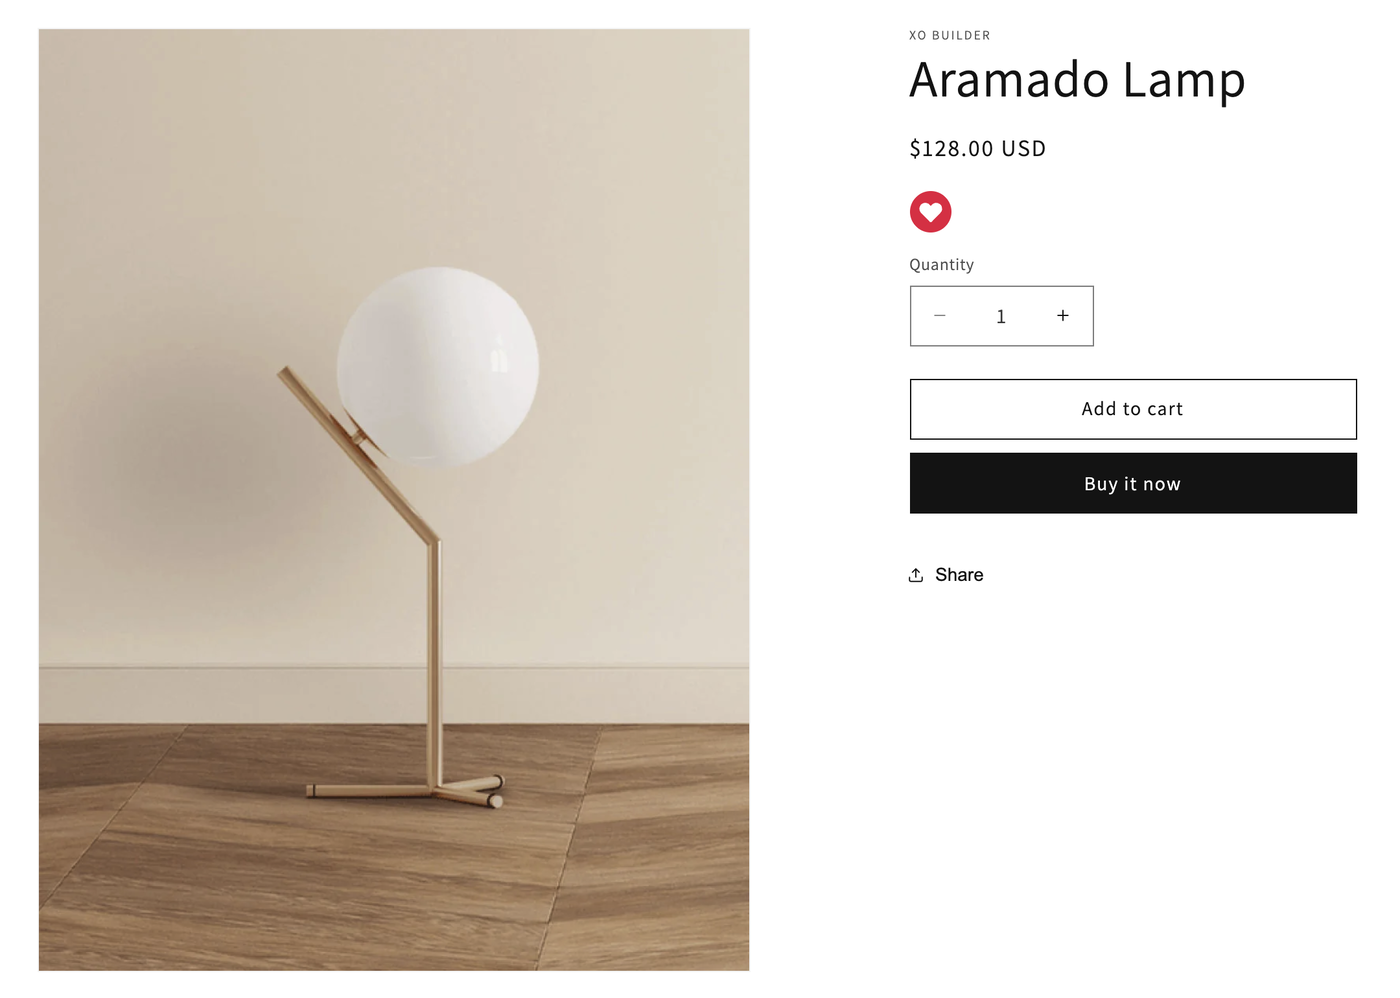
The "Add to wishlist" button next to Add to cart. It's added automatically, and you can restyle it or place it yourself.
On product pages, XB Wishlist adds an Add to wishlist button next to your Add to cart button. It works as soon as the app embed is on. There is nothing to switch on.
Customize it
Open Features, find Product Page Wishlist Button and click Customize.
Pick a style
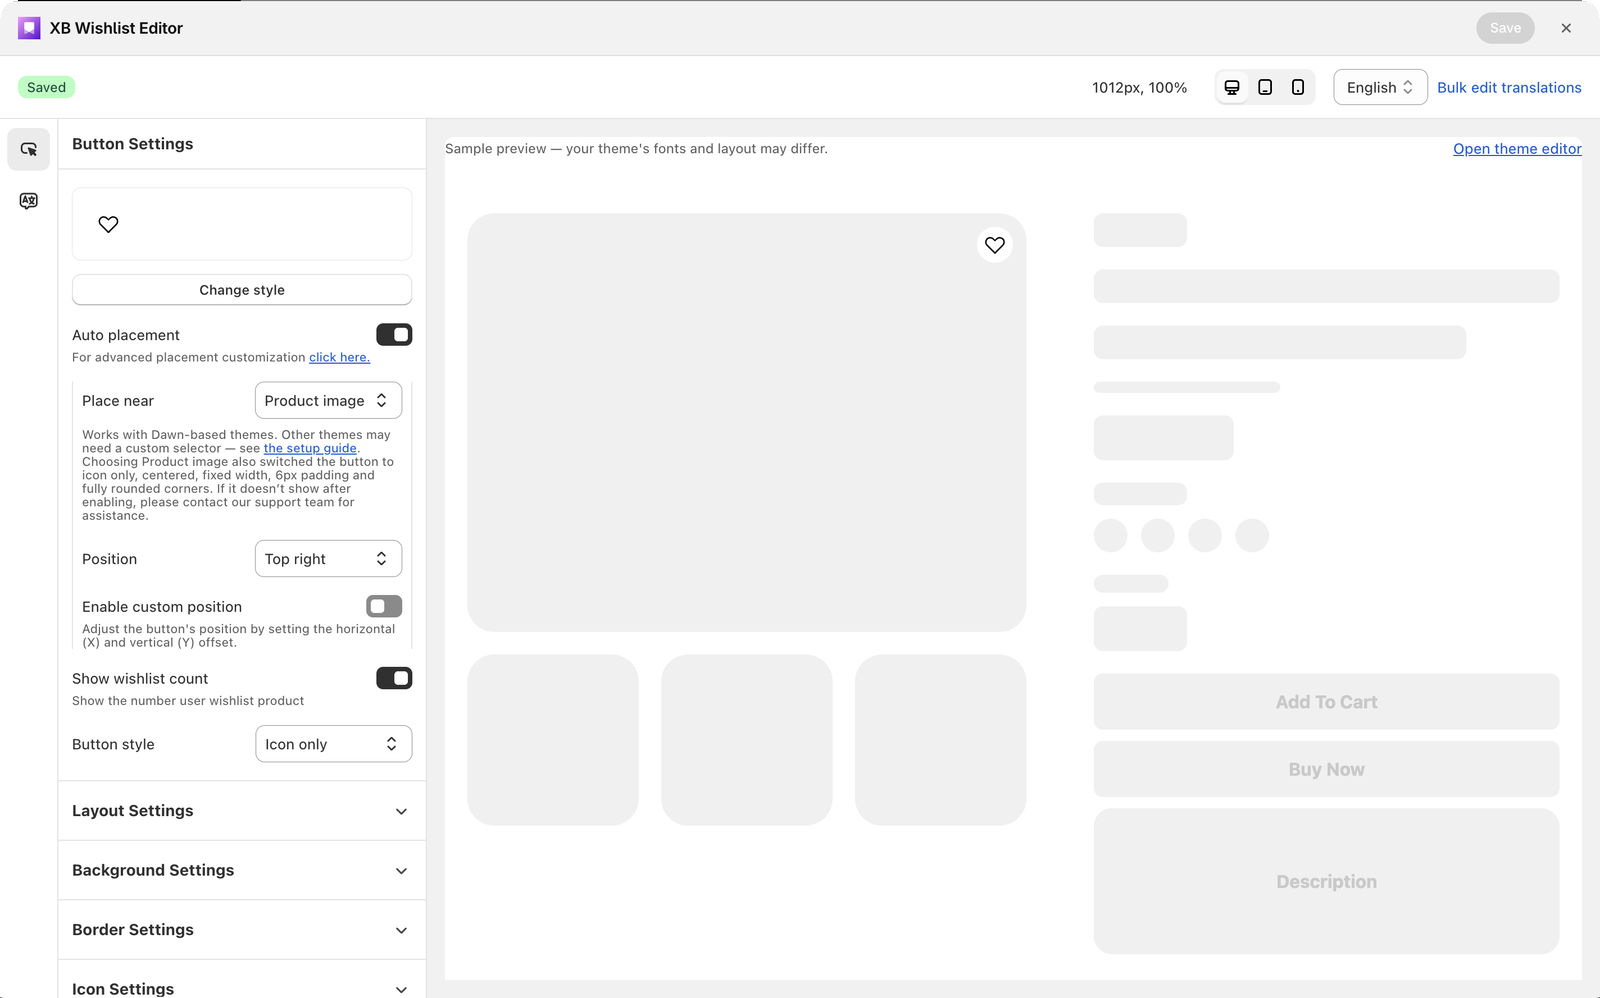
Click Change style under the preview to choose one of 13 ready-made styles. A style sets the button's colors and animations, and also the shared icon color, active color, animation and size. Fine-tune anything after that.
Auto placement
With Auto placement on, XB Wishlist finds the right spot on the page for you.
- Place near: Add to cart button, Buy button, Product description or Product image.
- Position: Above or Below that element.
Choose Product image to put a heart on the product photo instead, in the Top right, Top left, Bottom left or Bottom right corner. The button switches to an icon-only circle for that. Turn on Enable custom position to nudge it by a few pixels.
Auto placement is built for Dawn and themes based on it. If the button lands in the wrong place on your theme, place it yourself.
Look and text
| Group | Settings |
|---|---|
| Button style | With text (default) or Icon only. Show wishlist count adds the number of people who saved the product. |
| Layout Settings | Alignment, Button width type (Full width or Fixed width with a Button width), vertical and horizontal padding |
| Background Settings | Background color, Background color (active) for once it's saved, and a Background animation: Fade, Pulse, Gradient, Scale, Glow, Lift, Wave, Shimmer, Expand, Slide or Ripple |
| Border Settings | Border color, Border radius |
| Text Settings | Text font size, Text color, Text color (active) and a Text animation |
| Icon Settings | Override Icon Style gives this button its own icon instead of the shared Wishlist icon |
Under Language settings, change the texts: Before Add To Wishlist (default Add to wishlist), After Add To Wishlist (Remove from wishlist) and Loading. The accessible labels that screen readers announce are there too.
Place it yourself
For full control over where the button goes, use the app block:
- Go to Online Store → Themes → Customize, and open a product page.
- In the product information section, click Add block and choose XB Wishlist Button under Apps.
- Drag it where you want it and click Save.
The Home page Setup guide has an Add app block button that opens the theme editor at the right place.
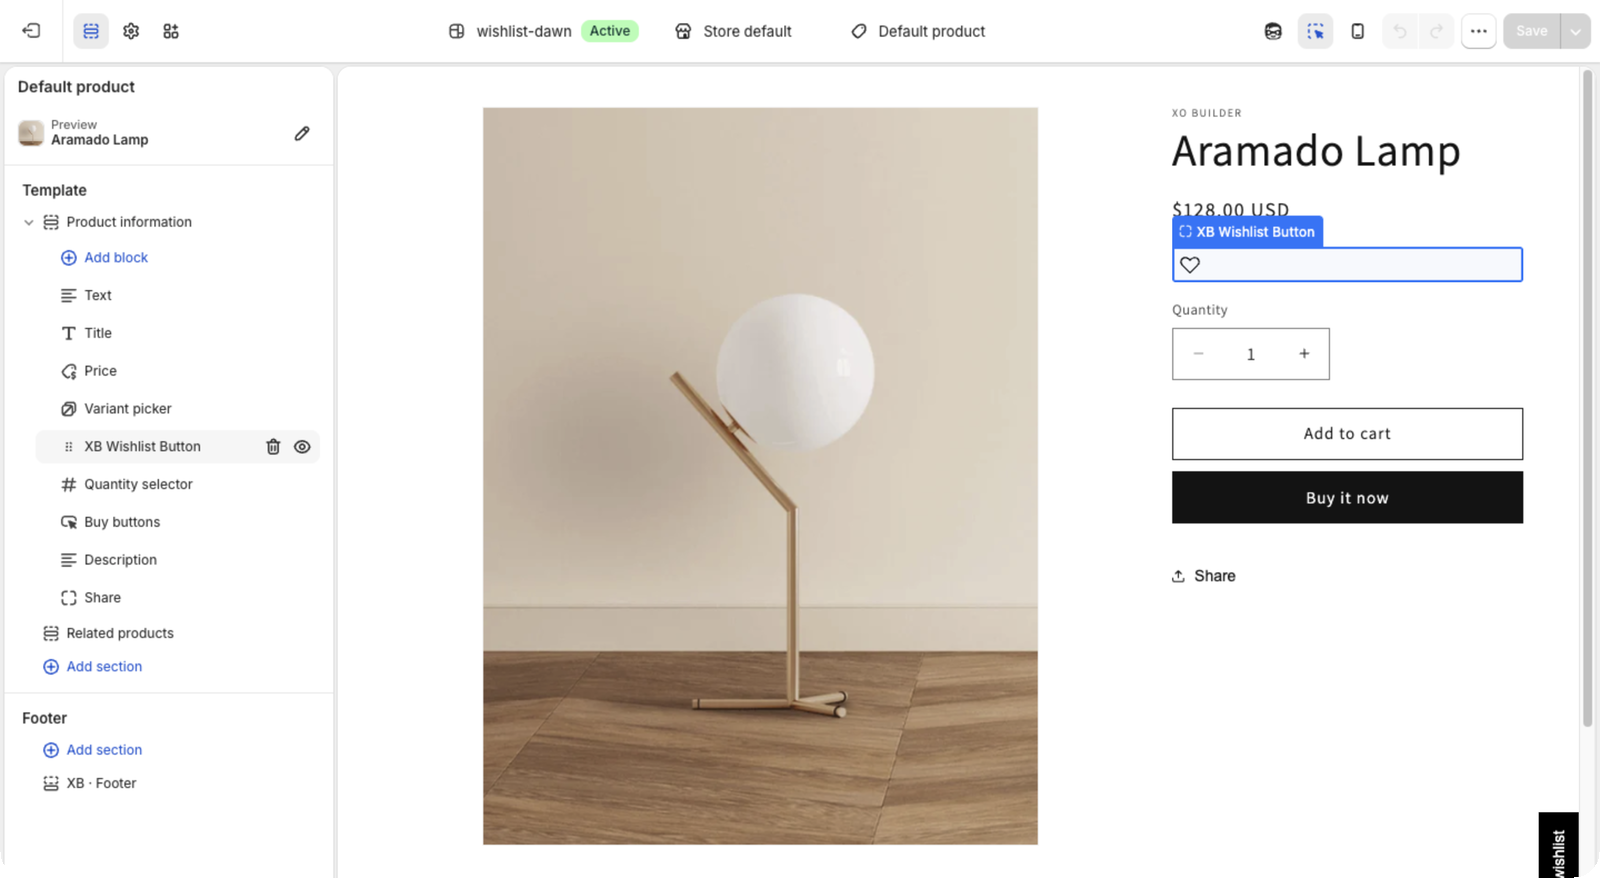
Once the block is on the page, the automatic button is no longer added, so the button never shows twice. The block uses the same style you set in the editor.
To place it in theme code instead, see Custom buttons and counters.
Variants
The button follows the variant picker. If Add by variant is on, switching from size M to L shows whether L is saved, and saving saves L.
Still stuck? Email [email protected] with your store’s .myshopify.com address and we’ll set it up with you.