Features
Multiple wishlists
Let customers keep separate named lists, like "Birthday" or "Living room", and on Pro, build them together with friends.
With Multiple Wishlists, signed-in customers can keep more than one list: Birthday ideas, Living room, For Mum. Everyone starts with one default list. They can create more, rename them, move items between them and delete them, right from the wishlist page.
It's available on every plan. Collaborative wishlists need Pro.
Turn it on
- Open Features and tick Enable on the Multiple Wishlists card.
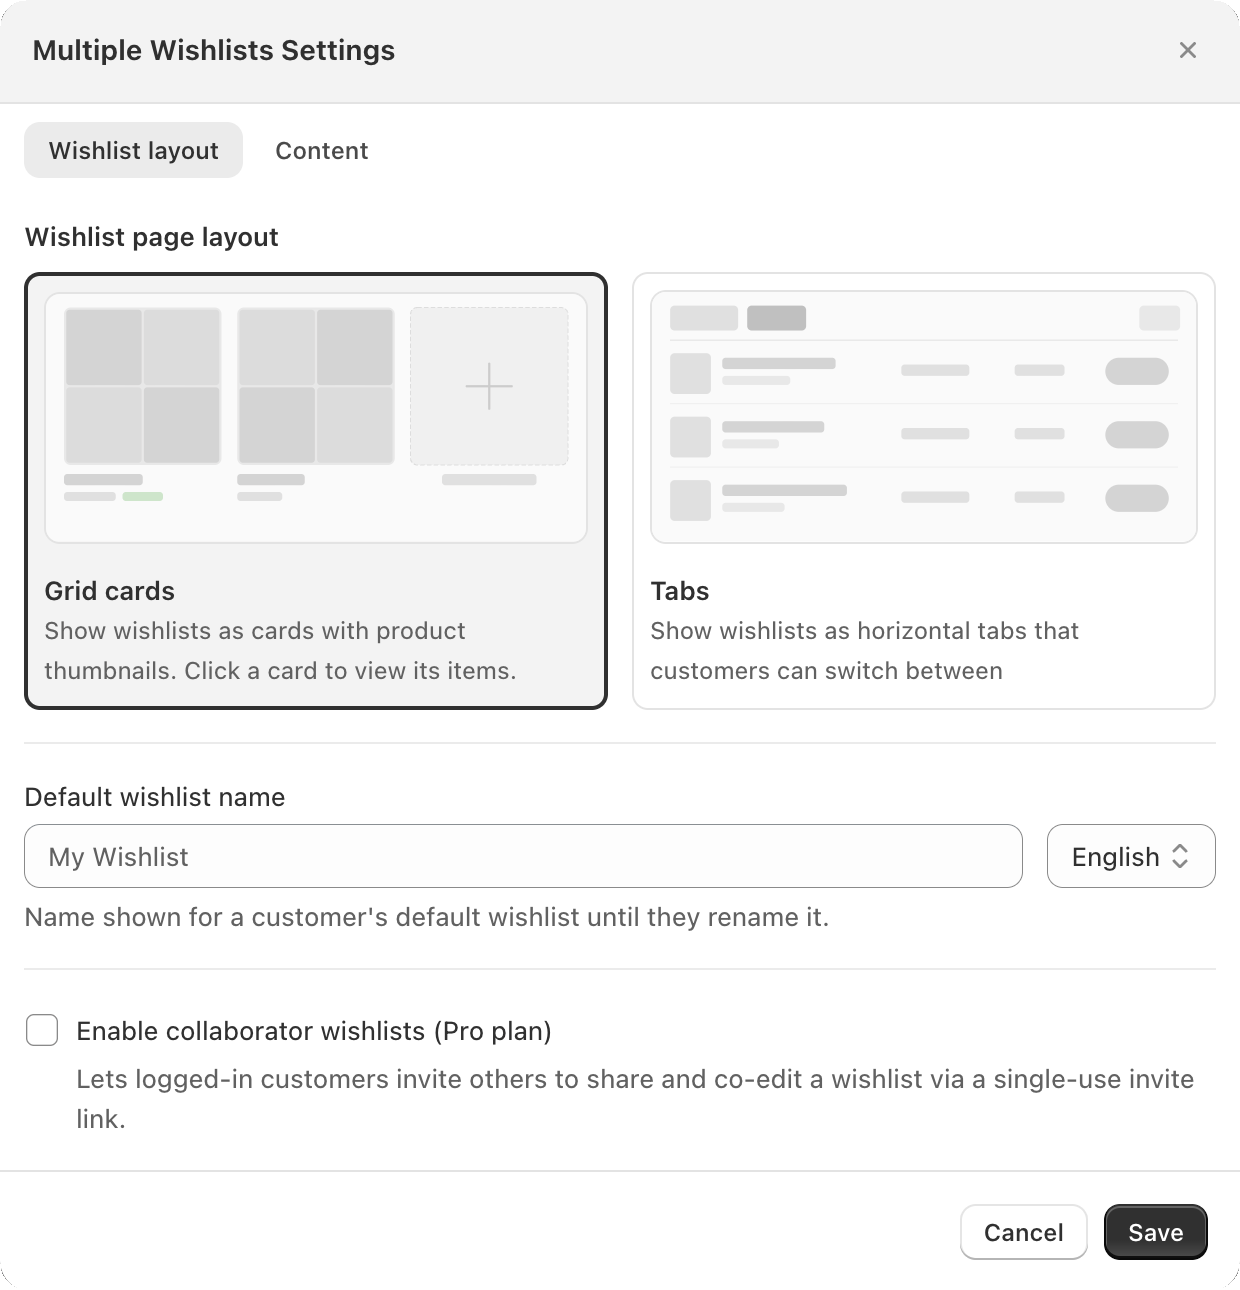
- Click Customize to choose the layout and the wording.
How shoppers use it
- Saving. A customer with one list saves straight into it, exactly as before. Once they have two or more, tapping the heart opens Add to Wishlist, where they pick a list or create a new one.
- Managing. On the wishlist page they can Create new wishlist, Rename and Delete a list, and Move item to another list. The default list is marked Default and can't be deleted.
- Guests. Multiple lists are for signed-in customers. A guest who tries to create a list is asked to log in. Their saved items stay in their single list, and it follows them into their account when they log in.
A customer can have up to 5 wishlists.
Settings
Wishlist layout tab:
| Setting | Options | Default |
|---|---|---|
| Wishlist page layout | Grid cards: each list is a card with product thumbnails, and clicking one opens it. Tabs: lists are tabs across the top. | Grid cards |
| Default wishlist name | The name of the list everyone starts with. It can be set for each language. | My Wishlist |
Content tab: every text shoppers see for lists. That includes the login prompt, create, rename and delete, the Add to Wishlist picker, moving items, and the collaborator texts. Pick a language at the top to translate them.
Collaborative wishlists
Pro plan. Customers can invite others to view and edit a wishlist with them, which is useful for a couple furnishing a home, a wedding list or a team ordering together.
Turn it on with Enable collaborator wishlists (Pro plan) in the Multiple Wishlists settings.
How it works for shoppers:
- The owner opens a list and clicks Invite, then Generate link.
- They send the link to someone. Each link works once and expires after a short time. The date is shown next to it. Revoke cancels a link that hasn't been used.
- The person who opens it logs in (or creates an account) and the list appears among their own wishlists, marked Shared by the owner.
- Both can now add and remove items. The owner sees everyone under Collaborators and can Remove someone. A collaborator can Leave wishlist at any time.
If you move from Pro to a lower plan, collaborative wishlists are turned off automatically.
Still stuck? Email [email protected] with your store’s .myshopify.com address and we’ll set it up with you.